Once you have created your AWS Account, you will want to build your solutions as quickly as possible. You will want to look at using an Infrastructure as Code (IaC) framework to assist in building on AWS. There are many frameworks to choose from, such as AWS CDK, AWS SAM, Serverless Framework, SST, Pulumi, Terraform, and Architect (to name a few). You can explore the Fundamentals strand for more details on frameworks. These frameworks will use the AWS CLI to interact with your AWS account to enable the creation, configuration, and deletion of AWS Managed Services.
Getting started with the AWS CLI you will end up on the Quick Setup page of the AWS Documentation which walks you through setting up credentials. The credentials will involve using an Access Key ID and Secret Access Key for either your root account or an IAM user, which typically goes like this:
aws configure
AWS Access Key ID [None]: AKIAIOSFODNN7EXAMPLE
AWS Secret Access Key [None]: wJalrXUtnFEMI/K7MDENG/bPxRfiCYEXAMPLEKEY
Default region name [None]: us-west-2
Default output format [None]: json
While there is nothing wrong with the above process and it will work fine, and everything will be okay. But it introduces several security problems.
- Access Key ID and Secret Access Key are saved on your local file system in an unencrypted file, which could allow malicious applications to read and steal your credentials.
- Newcomers generally do this using their root login, which provides open access to your AWS Account.
Resolve these security problems by creating a new User for your account with programmatic access only and then add MFA configuration. The remainder of this article will walk you through the following steps:
- Creating an IAM Policy to enforce Multi-Factor Authentication (MFA)
- Creating a new IAM User Group
- Creating a new User for Programmatic access
Creating an IAM Policy to enforce Multi-Factor Authentication (MFA)
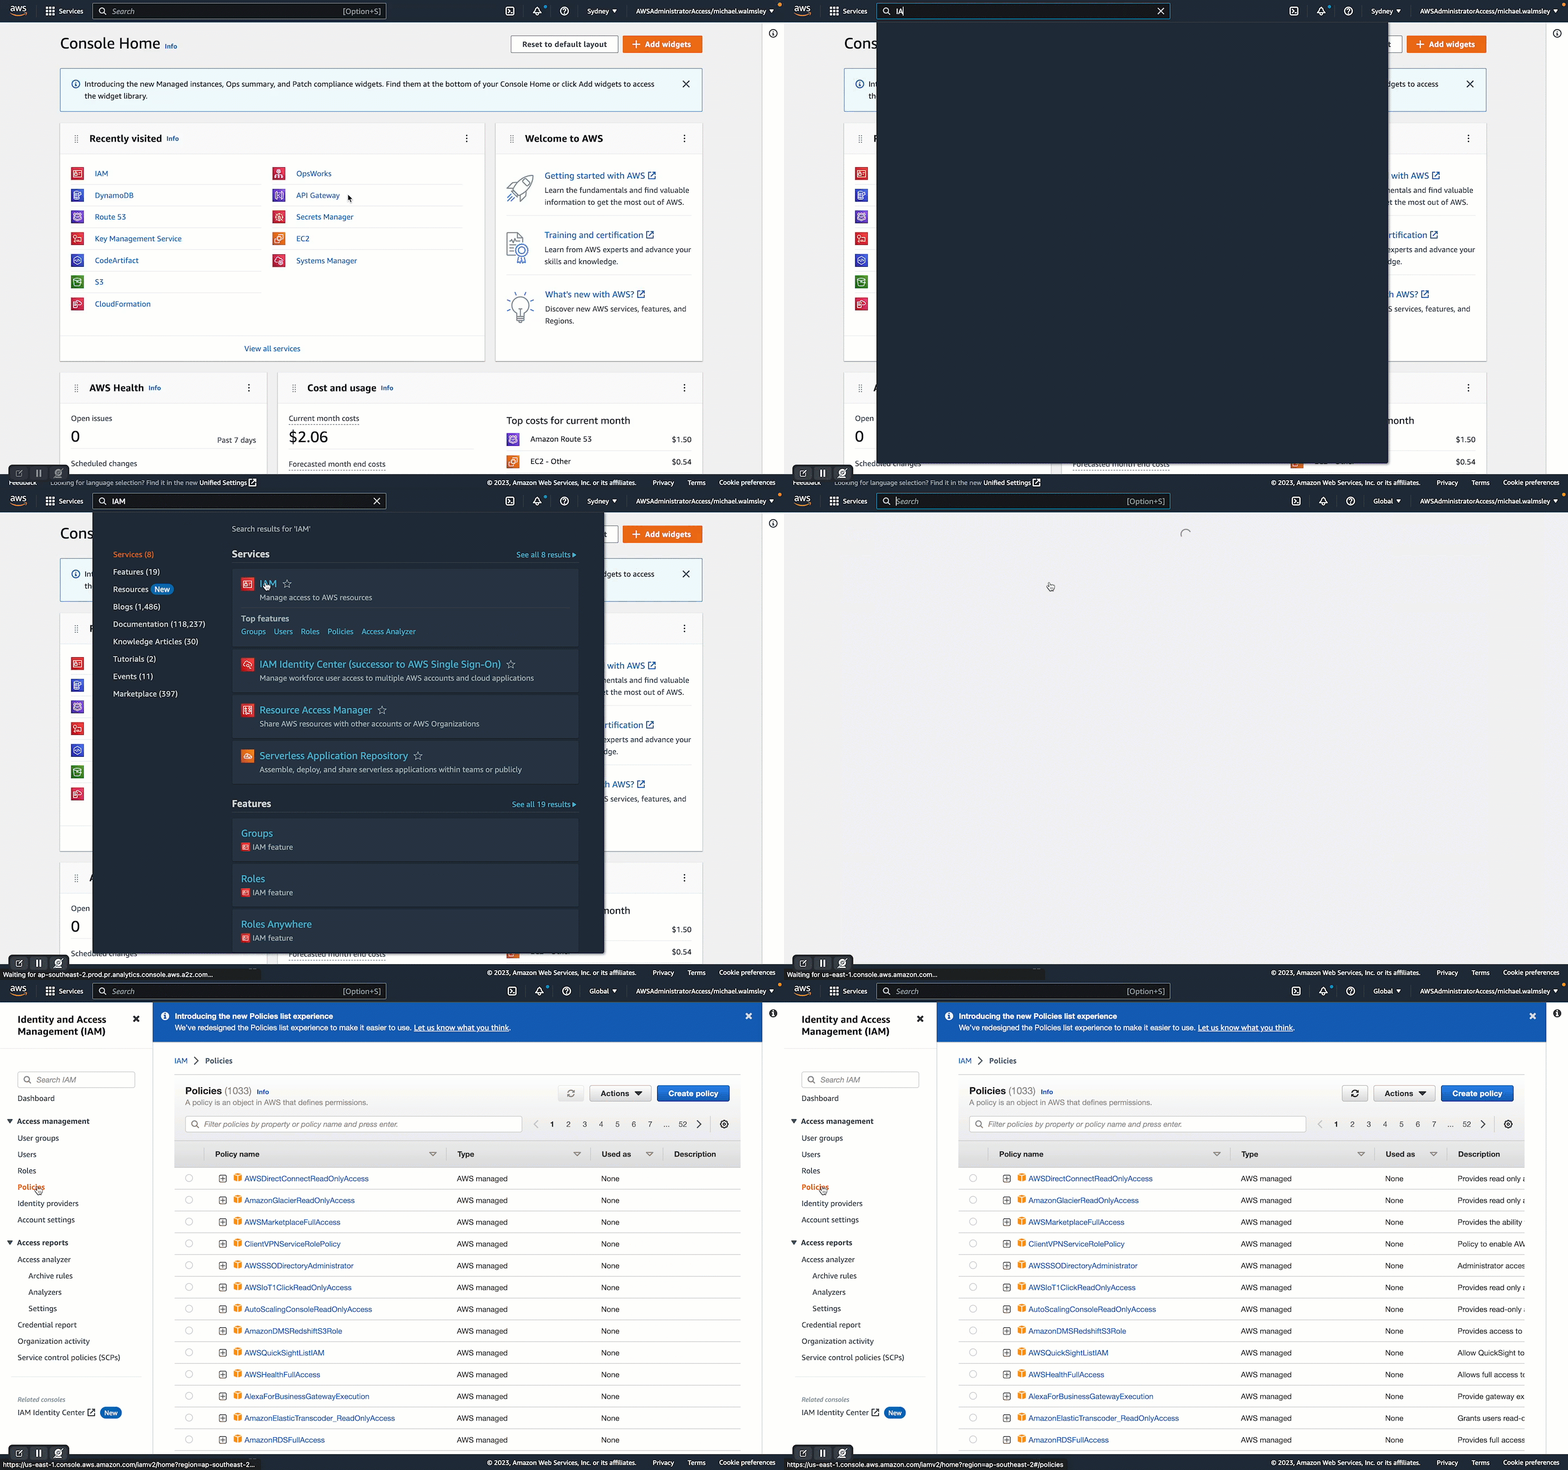
Finding the IAM service in the AWS Console can be daunting at first. There are a LOT services in the AWS cloud, so browsing for the services is difficult. You can quickly find the Service console you need using the search bar at the top of the screen. Lets open up the IAM Policies console so we can create the policy we need, you can follow along in the video below.

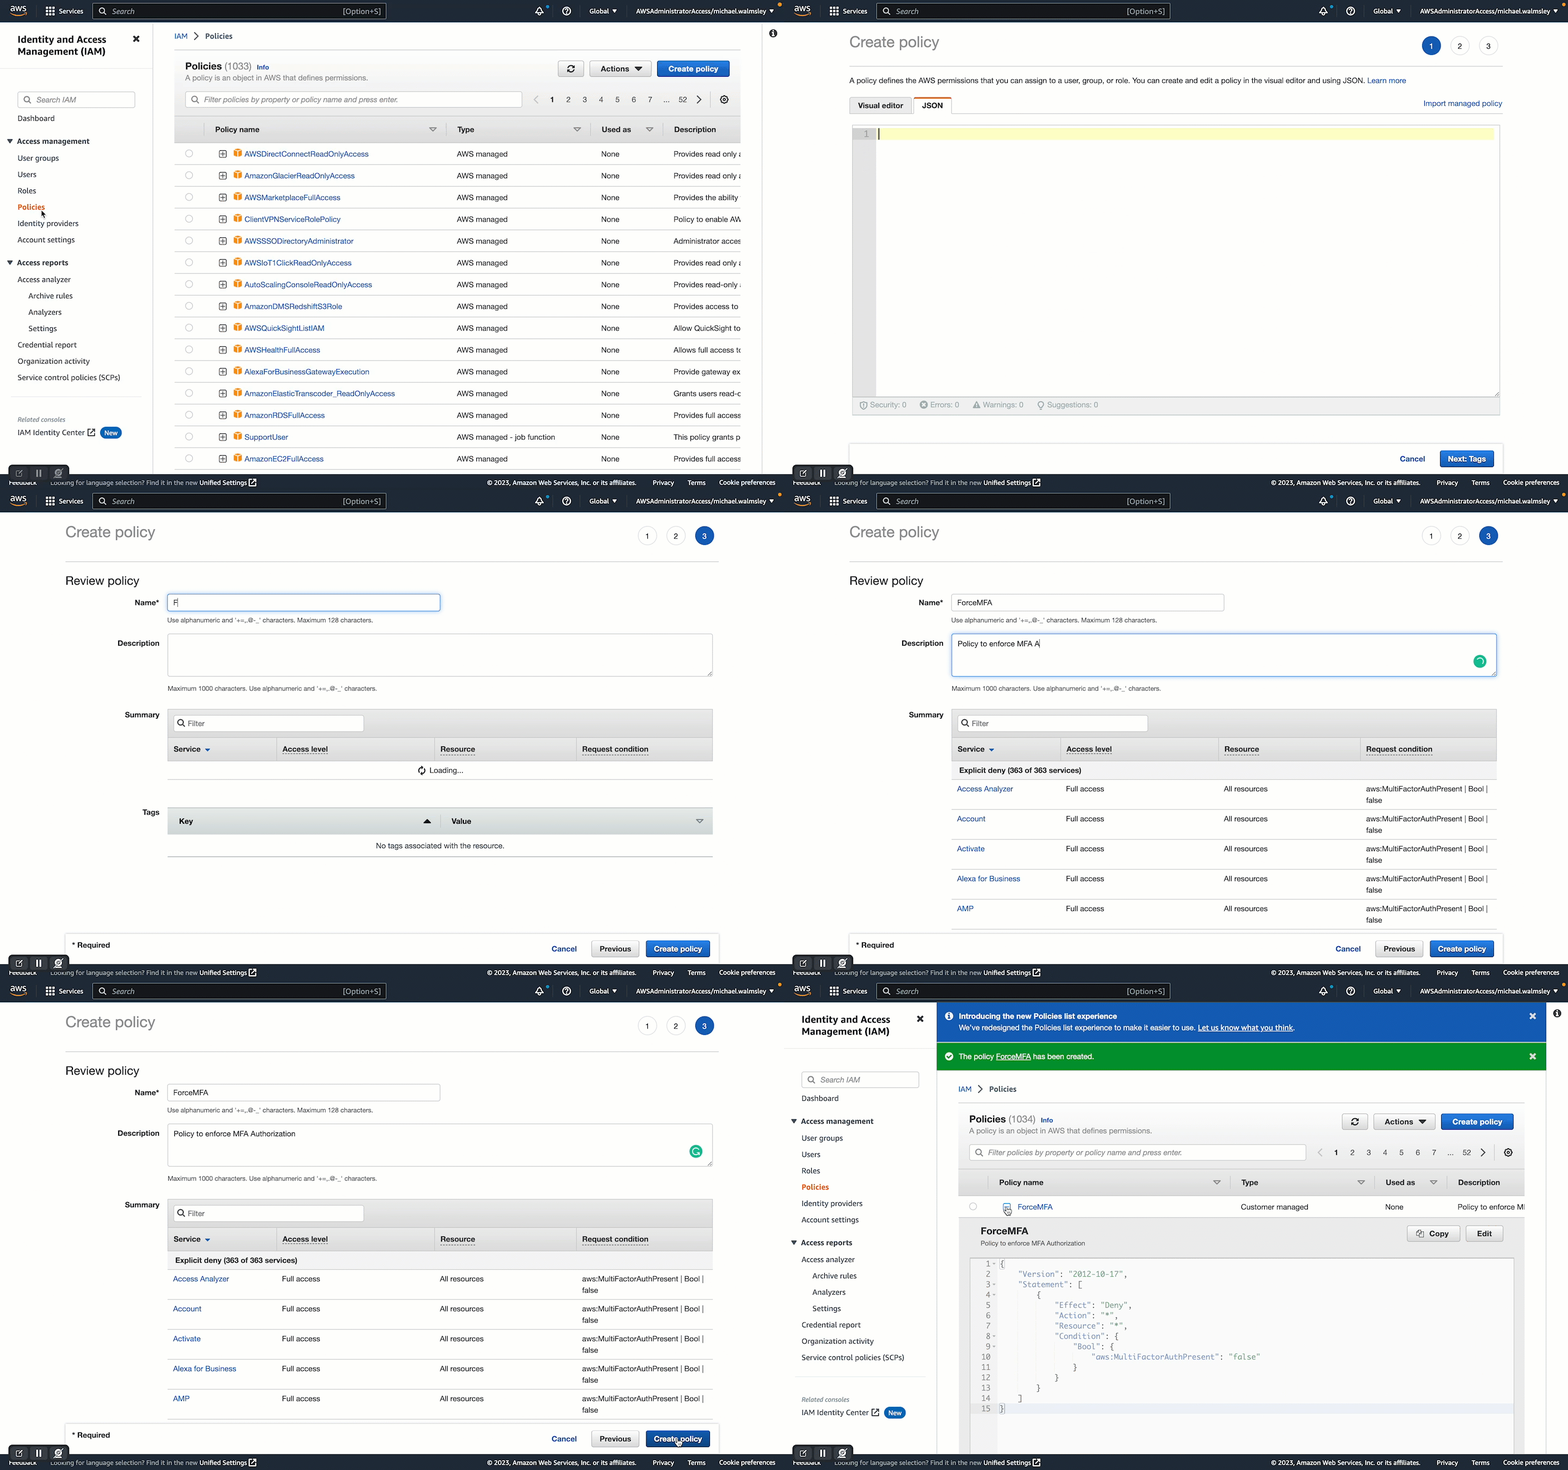
We need to create a new Policy using the following template with the name ForceMFA:
{
    "Version": "2012-10-17",
    "Statement": [
        {
            "Effect": "Deny",
            "Action": "*",
            "Resource": "*",
            "Condition": {
                "Bool": {
                    "aws:MultiFactorAuthPresent": "false"
                }
            }
        }
    ]
}
The key to this policy is the "Effect": "Deny" which will deny authorisation when the "Condition" of "aws:MultiFactorAuthPresent": "false" is true. Attaching this policy to a User or Group will ensure that only users authenticated via an MFA token can access and manage your AWS Account. Let's take the snippet above and create the ForceMFA policy.

Creating a New IAM User Group
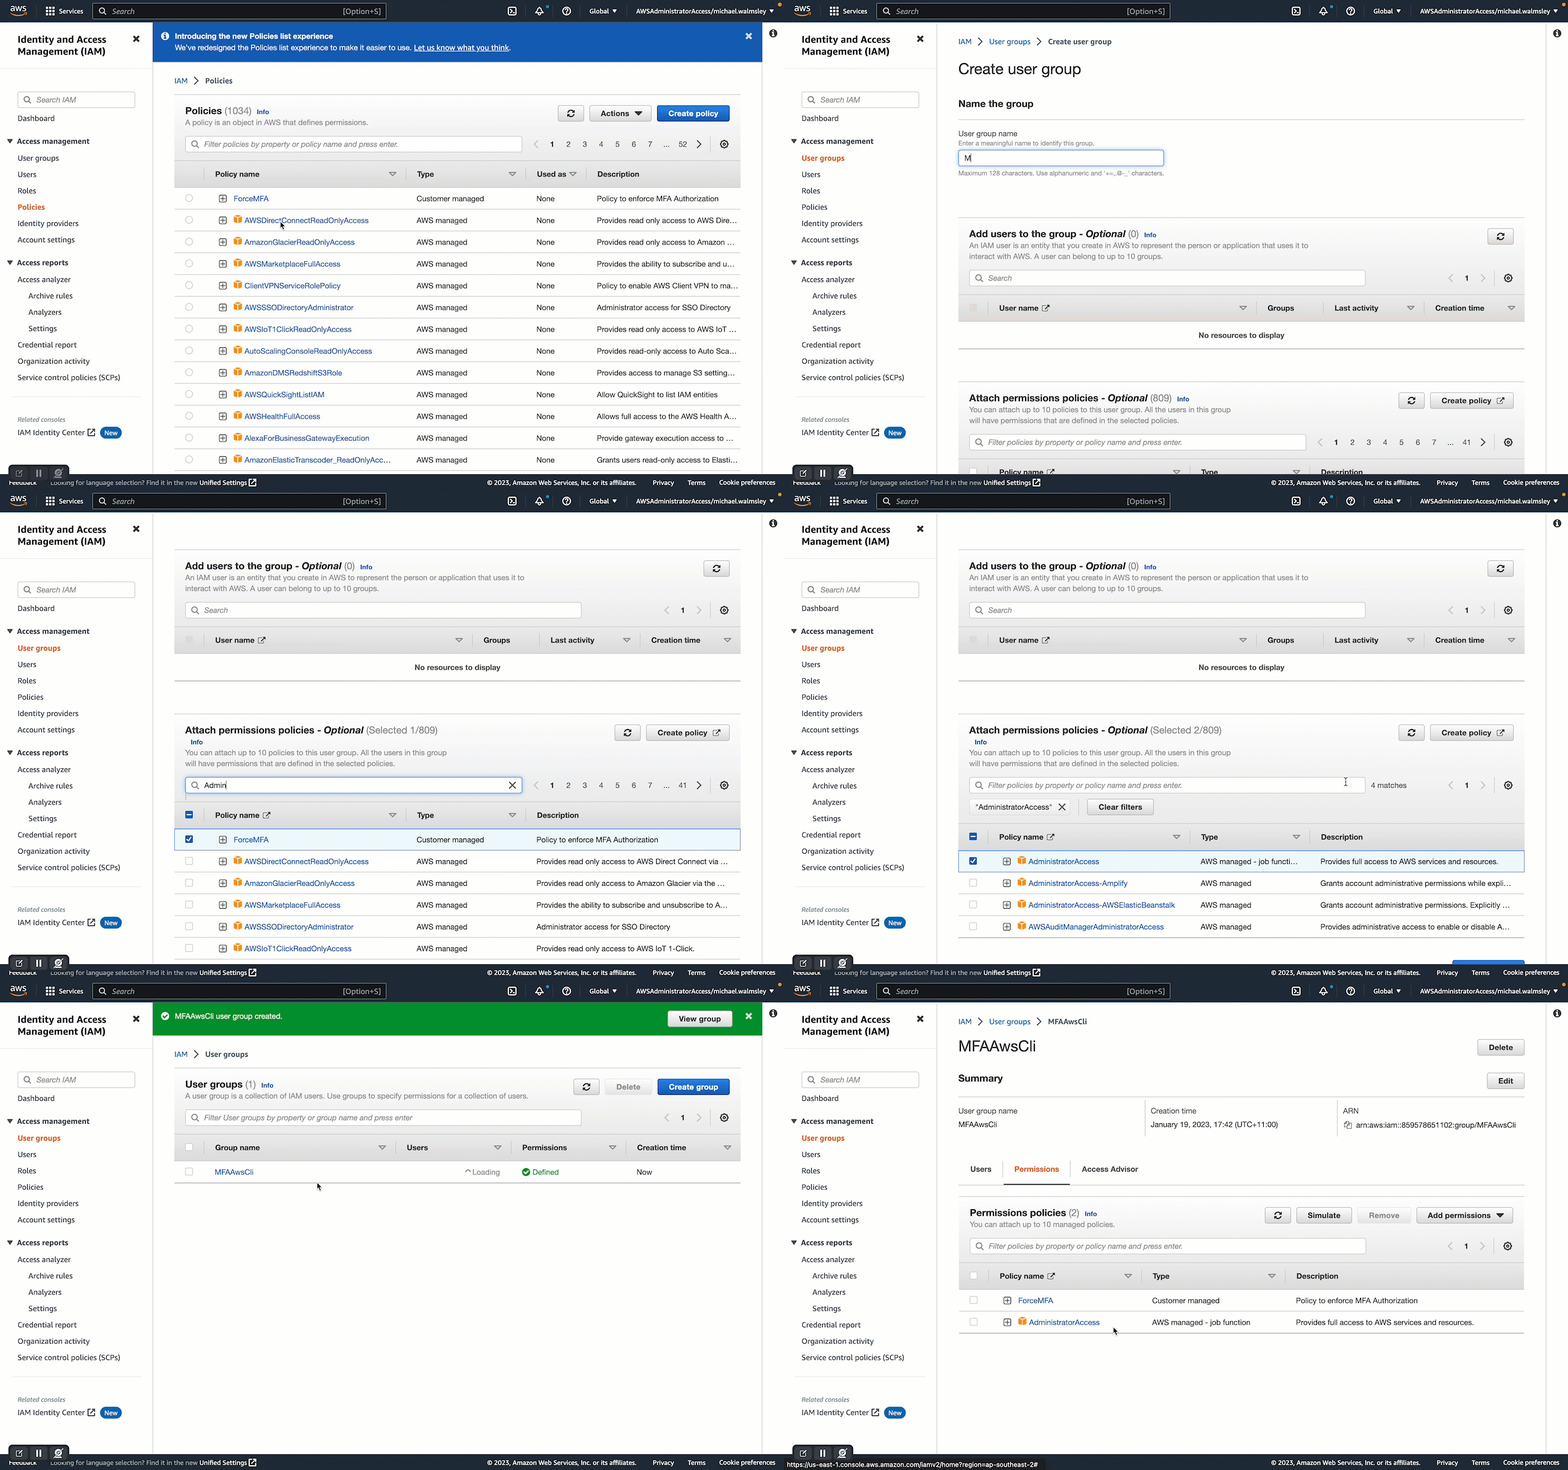
Creating a new IAM Group is not strictly necessary. However, applying IAM Policy customisations to IAM Groups rather than Users is a good practice. Sure, you may be the only one using your AWS Account, but if you start working in a larger organisation you will want to use Groups to help manage User permissions. Lets create an MFAAwsCli IAM Group and attach our ForceMFA policy along with the default AWS policy of AdministratorAccess. Applying the default policy will allow AWS CLI users with your credentials and MFA token to do anything in your AWS account. With FroceMFA applied, you have the added security of someone needing your virtual MFA device to use the AWS CLI, so this is not a huge problem.

Creating a New IAM User for Programmatic Access
With the IAM Policy attached to the IAM Group, we can now create our user. Let's make the CliAdmin user.


